How to Switch Phone Carriers Keep Your Number: A Comprehensive Guide for iPhone and Android Users
In today’s dynamic mobile landscape, switching phone carriers has become increasingly common. Whether you’re seeking better coverage, lower monthly bills, or access to the latest phone models, moving your service to a new provider doesn’t mean sacrificing your familiar phone number. This comprehensive guide will walk you through the process of switching carriers while keeping your existing number, covering both iPhone and Android devices, and providing helpful tips, a comparison chart of data transfer methods, troubleshooting advice, and an FAQ.
Why Make the Switch? The Benefits of Changing Carriers
There are numerous compelling reasons to consider switching phone carriers:
- Cost Savings: Your current plan might no longer align with your usage or budget. New carriers often offer attractive promotional deals, discounted plans, or better family packages that can significantly reduce your monthly expenses.
- Improved Coverage: Network coverage varies by location. If you frequently experience dropped calls, slow data speeds, or weak signals in areas you frequent, a different carrier might offer superior network infrastructure in your region. Checking coverage maps and asking for local recommendations can help.
- Better Customer Service: Frustrated with long hold times, unhelpful support, or unresolved issues with your current provider? A carrier known for excellent customer care can dramatically improve your overall experience.
- Access to Latest Devices and Plans: Carriers often have exclusive deals on new phone models or offer flexible upgrade options. Switching can open doors to the latest technology or more favorable financing terms.
- Enhanced Features and Perks: Many carriers bundle services like streaming subscriptions, international roaming, or loyalty programs. You might find a new provider offers a more compelling suite of additional features that align with your lifestyle.
The Essential First Step: Mobile Number Portability (MNP)
The key to keeping your existing number is Mobile Number Portability (MNP). This regulatory provision allows you to transfer your phone number from one service provider to another.
Crucial Advice: DO NOT cancel your existing service before initiating the porting process! Only active phone numbers can be ported. Your new carrier will handle the cancellation of your old service once the number transfer is successfully underway.
How to Switch Phone Carriers Keep Your Number: Step-by-Step
The general process for porting your number is similar for both iPhone and Android:
- Contact Your Current Provider (or use Text-to-Switch):
- Request a Porting Authorization Code (PAC) / Account Number & PIN: In many regions (like the UK), you’ll need a PAC code. In others (like the US and Canada), you’ll typically need your account number and sometimes a PIN from your current provider. This information is vital for your new carrier to initiate the transfer.
- Text-to-Switch (UK Specific): For UK users, a simple way to get your PAC code is to text “PAC” to 65075. You should receive your code within two hours.
- Traditional Method: You can call your current provider’s customer service. Be prepared to verify your identity. PAC codes usually have a limited validity (e.g., 30 days).
- Choose Your New Carrier and Plan:
- Research different carriers, compare plans, coverage maps, and pricing.
- Once you’ve decided, inform your new carrier that you wish to port your existing number.
- Provide Your PAC/Account Info to the New Carrier:
- Your new carrier will ask for the PAC code or your old account number and any necessary PIN. This is where they take over the porting process.
- They will submit the porting request to your old provider.
- Receive Your New SIM Card:
- Your new carrier will provide you with a new SIM card. Keep your old SIM card in your phone until the porting process is complete.
- Activation and Completion:
- You’ll typically receive an SMS or notification when the porting is scheduled to occur. This often happens overnight or within a few business days.
- Once confirmed, insert your new SIM card into your phone.
- Test your service by making a call or sending a text. If successful, your number has been ported! Your old service will automatically be canceled.
Important Considerations:
- Contractual Obligations: Be aware of any early termination fees (ETFs) with your current contract. While carriers cannot refuse to port your number due to outstanding fees, you are still obligated to pay them.
- Handset Unlocking: If your current phone is “locked” to your old network, it may not work with your new carrier’s SIM. You might need to request an unlock from your old provider or purchase a new, unlocked phone.
- Billing Cycles: Your final bill from your old provider might include pro-rated charges or any outstanding balances.
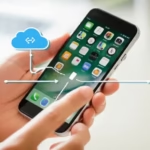
Transferring Your Data: Wireless vs. Cable
Once you have switch phone carriers keep your number and you have your new SIM and number ported, the next step is getting your contacts, photos, apps, and other data onto your new device. Both iPhone and Android offer built-in and third-party options for this.
Wireless Data Transfer
Wireless methods are generally the most convenient.
For iPhone (iOS to iOS):
- Quick Start: This is Apple’s built-in tool for setting up a new iPhone using your old one.
- Ensure both iPhones are charged, connected to Wi-Fi, and Bluetooth is on.
- Place your new iPhone near your old one.
- Follow the on-screen prompts on your old iPhone to set up the new one.
- You can choose to transfer data directly from your previous device or restore from an iCloud backup.
- iCloud Backup: If you regularly back up your iPhone to iCloud, you can simply restore this backup to your new device.
- During the new iPhone setup, select “Restore from iCloud Backup.”
- Sign in with your Apple ID and choose the desired backup.
For Android (Android to Android):
- Google Account Backup: Android devices automatically back up significant data (contacts, calendar, Wi-Fi passwords, app data, some settings) to your Google Account.
- During the new Android phone setup, sign in with your Google Account.
- You’ll be prompted to restore data from a previous device or backup.
- Built-in Transfer Tools (e.g., Samsung Smart Switch): Many Android manufacturers offer their own proprietary data transfer apps that use Wi-Fi Direct or local networks.
- Samsung Smart Switch: Excellent for transferring data between Samsung devices, and even from iOS or other Android devices to a Samsung phone. It can transfer contacts, messages, photos, videos, apps, and even device settings wirelessly.
Data Transfer via Cable
Using a cable often provides a faster and more reliable transfer, especially for large amounts of data.
For iPhone (iOS to iOS):
- Wired Quick Start: For iPhone 15 models (USB-C) or earlier models (Lightning to USB 3 Camera Adapter + Lightning to USB cable), you can directly connect your old and new iPhones.
- Connect the two iPhones with the appropriate cable (e.g., USB-C to USB-C for iPhone 15, or Lightning to USB-C for older iPhone to iPhone 15).
- Follow the Quick Start prompts on both devices.
For Android (Android to Android):
- USB Cable during Setup: When setting up a new Android phone, you’ll often be given the option to “Copy your data” from your old phone using a cable (often USB-C to USB-C or USB-A to USB-C with an adapter).
- Connect the two devices with a suitable USB cable.
- Follow the on-screen instructions to select and transfer data.
- Manufacturer-Specific PC Software: Some Android brands offer PC software (e.g., Samsung Smart Switch for PC/Mac) that allows you to back up your old phone to your computer and then restore it to your new device via USB.
iPhone to Android / Android to iPhone:
- Switch to iOS / Switch to Android apps: These official apps facilitate cross-platform transfers.
- Move to iOS (for Android to iPhone): Download on your Android, connect to a temporary Wi-Fi network created by the new iPhone, and transfer contacts, message history, camera photos/videos, web bookmarks, mail accounts, and calendars.
- Switch to Android (for iPhone to Android): Download on your iPhone, connect wirelessly or with a cable, and transfer contacts, photos, videos, calendar events, and sometimes even WhatsApp chats.
Comparison Chart: Data Transfer Methods – After you Switch Phone Carriers Keep Your Number
| Feature/Method | Wireless (Built-in) – iPhone | Wireless (Built-in) – Android | Wired (Built-in) – iPhone | Wired (Built-in) – Android | Third-Party Apps (General) |
| Ease of Use | Very High | High | High | High | Moderate to High |
| Speed | Moderate (depends on Wi-Fi) | Moderate (depends on Wi-Fi) | High | High | Varies (often High) |
| Data Types | All apps & data, settings | Contacts, photos, apps, some settings | All apps & data, settings | Contacts, photos, apps, some settings | Varies by app; usually broad |
| Connectivity | Wi-Fi, Bluetooth | Wi-Fi, Wi-Fi Direct | Cable (Lightning/USB-C) | Cable (USB-C) | Wi-Fi, USB, Cloud |
| Cross-Platform | Limited (via Move to iOS) | Limited (via Switch to Android) | No | No | Yes (many are cross-platform) |
| Requires Old Device | Yes | Yes | Yes | Yes | Sometimes (for direct transfer) |
| Requires PC | No | No | No | No | Some offer PC backup/restore |
Built-in Apps vs. Third-Party Apps for Data Transfer
Built-in Apps
Advantages:
- Seamless Integration: Designed by the device manufacturers, ensuring optimal compatibility and performance.
- User-Friendly: Often integrated into the initial phone setup process, making it very intuitive for new users.
- Comprehensive Transfer: Can typically transfer a wider range of data, including system settings, app data (where allowed by developers), and personalized configurations.
- Security: Generally considered secure as they come directly from trusted sources.
Examples:
- Apple Quick Start: For iPhone to iPhone transfers, offering both wireless and wired options.
- iCloud Backup/Restore: Apple’s cloud-based backup solution.
- Google Account Backup/Restore: Android’s native cloud backup service for essential data.
- Samsung Smart Switch: Samsung’s powerful tool for migrating data to Galaxy devices from various sources.
- OnePlus Switch (Clone Phone), Xiaomi Mi Mover, Huawei Phone Clone: Similar tools offered by other Android manufacturers.
Third-Party Apps
Advantages:
- Cross-Platform Compatibility: Many are designed to transfer data between different operating systems (e.g., Android to iOS, or vice-versa).
- Specific Data Transfer: Some specialize in specific data types (e.g., WhatsApp chat history transfer).
- Advanced Features: May offer features like selective data transfer, cloud integration beyond native options, or PC-based management.
Examples:
- SHAREit / Xender / Zapya: Popular for fast, local file sharing across various platforms, especially good for large media files.
- Send Anywhere: Focuses on secure, encrypted file transfer between devices.
- Google Drive / Dropbox / OneDrive: Cloud storage services that can be used to manually backup and restore photos, documents, and other files.
- Wondershare MobileTrans / AnyTrans: Comprehensive PC-based software solutions that offer extensive data transfer, backup, and restore capabilities across different phone brands and OS.
Additional Helpful Content
- Check Compatibility: Before switching, ensure your current phone is compatible with the new carrier’s network technology (e.g., GSM vs. CDMA, 5G bands). Unlocked phones offer the most flexibility.
- Backup Everything: Always perform a full backup of your device before starting any transfer or porting process. This is your safety net.
- Clean Up Old Data: Use the opportunity of a new phone or transfer to delete unnecessary apps, photos, and files.
- Disable iMessage (if switching from iPhone to Android): If moving from iPhone to Android, remember to deregister iMessage to ensure you receive SMS messages from iPhone users on your new Android device. You can do this via Apple’s website.
Troubleshooting Common Problems when You Switch Phone Carriers Keep Your Number
- Porting Delays/Failures:
- Issue: Your number isn’t porting within the expected timeframe, or the port fails.
- Solution:
- Verify Information: Double-check that you provided your new carrier with the exact account number and PIN/PAC code from your old carrier. Even a small typo can cause issues.
- Contact New Carrier: Your new carrier is responsible for the porting process. Contact their porting department and provide them with any error messages or delays you’re experiencing.
- Check Old Account Status: Ensure your old account is still active and in good standing (no outstanding bills that might flag the transfer, though carriers cannot refuse porting due to debt, they might hold up the process).
- Regulatory Body: If delays persist without clear explanation, you can escalate the issue to your country’s telecommunications regulatory body (e.g., FCC, Ofcom).
- No Service After Porting:
- Issue: Your new SIM is in, but you have no signal or cannot make calls/texts.
- Solution:
- Restart Phone: A simple restart often resolves initial connectivity issues.
- Check SIM Insertion: Ensure the SIM card is correctly inserted.
- APN Settings: Sometimes, particularly with MVNOs (Mobile Virtual Network Operators), you might need to manually configure Access Point Name (APN) settings. Your new carrier’s support will have these.
- Network Selection: Go to your phone’s settings > Mobile network > Network operators and ensure it’s set to automatically select the network, or manually select your new carrier.
- Missing Data After Transfer:
- Issue: Some photos, contacts, or apps didn’t transfer.
- Solution:
- Check Backup Source: Verify that the data was actually included in your backup (e.g., if restoring from iCloud, check what was included in that specific backup).
- Cloud Sync: Ensure your contacts, calendars, and emails are synced to cloud services (Google Account, iCloud, Outlook) so they automatically populate on your new device when you sign in.
- Re-download Apps: Apps usually don’t transfer directly; instead, their data might. You’ll need to re-download apps from the App Store or Google Play.
- Manual Transfer: For any stubbornly missing files, consider manually transferring them via cloud storage, email, or a computer.
- Early Termination Fees (ETFs):
- Issue: Being charged a significant fee by your old carrier.
- Solution:
- Review Contract: Before initiating the switch, thoroughly review your old contract for any ETF clauses and their calculation.
- Negotiate: Sometimes, if you’re close to the end of your contract, your old carrier might waive or reduce the fee if you express dissatisfaction with their service (though they are not obligated to).
- New Carrier Incentives: Some new carriers offer to cover ETFs as part of a promotional offer. Inquire about this when signing up.
Frequently Asked Questions (FAQ) when You Switch Phone Carriers Keep Your Number
Q1: How long does it take to port my number? A1: For wireless-to-wireless transfers, it typically takes a few hours to a few business days, depending on your region and the carriers involved. Some countries have regulations for next-business-day porting. Wireline-to-wireless or more complex ports might take longer.
Q2: Can I port my landline number to a mobile phone? A2: In many regions, yes. This is known as wireline-to-wireless porting. Check with your prospective new wireless carrier to confirm if this is an option for your specific number and area.
Q3: Do I need to unlock my phone before switching carriers? A3: If your phone is locked to your current carrier’s network, you will need to get it unlocked to use it with a new carrier. Most carriers have policies for unlocking devices once your contract is fulfilled or a certain period has passed.
Q4: Will I lose my voicemail messages when I switch? A4: Yes, voicemail messages are typically stored on your old carrier’s network. It’s advisable to listen to and save any important voicemails before porting your number, as they generally do not transfer.
Q5: What if I don’t want to keep my old number? A5: If you prefer a fresh start with a new number, simply sign up for a new plan with your chosen carrier and they will issue you a new number. You can then cancel your old service once your new service is active (after backing up any data you need).
Q6: Can I switch from prepaid to postpaid and keep my number? A6: Yes, in most cases, you can port your number between prepaid and postpaid services, provided you meet the eligibility criteria (e.g., active service, no outstanding dues if postpaid).
Additional helpful information:
External Links for Authoritative Sources:
- United States (FCC – Federal Communications Commission):
- United Kingdom (Ofcom):
- Switching mobile providers (While not a direct PAC code link, Ofcom regulates the process.)
- Canada (CRTC – Canadian Radio-television and Telecommunications Commission):
- Australia (ACMA – Australian Communications and Media Authority):
- India (TRAI – Telecom Regulatory Authority of India):
If you have a new phone and you want to transfer all your data from your old phone, this post will help. Transfer Data from Old Phone to New – iPhone or Android
By following these guidelines and utilizing the available tools, switching phone carriers and keeping your cherished number can be a smooth and rewarding experience, leading to better service, savings, and satisfaction.