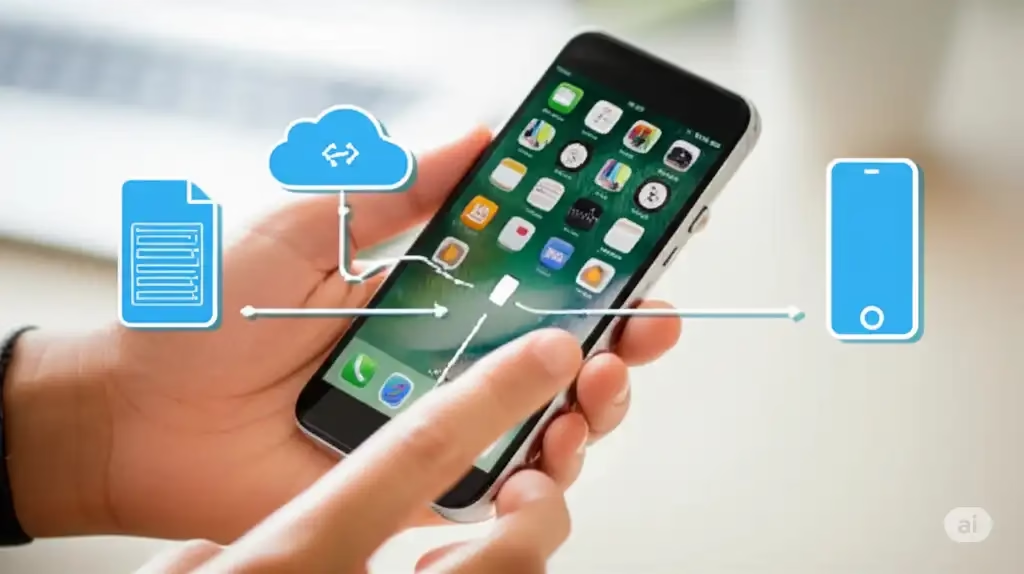
Backup Your Phone: Secure Your Digital Life
In today’s digital age, our smartphones hold a wealth of important information: precious photos and videos, crucial contacts, important documents, and cherished memories. Losing this data due to a lost, stolen, damaged, or malfunctioning phone can be a stressful experience. Regularly backing up your phone is the most effective way to safeguard your digital life and ensure you can recover your data when needed. This comprehensive guide will walk you through the best methods for backing up both iPhones and Android devices. Learn more about how to backup your phone.
Why it is so Important to Backup Your Phone?
Imagine losing all your photos from your last vacation or all your important work contacts. These scenarios highlight the critical need for regular backups. A phone backup creates a copy of your phone’s data, allowing you to restore it to a new or repaired device. It offers peace of mind knowing your digital life is protected against unforeseen circumstances.
The Best Primary Backup Method: Embrace the Cloud
For most users, cloud backup is the recommended primary method for backing up your phone. It’s generally automatic, convenient, and accessible from anywhere with an internet connection.
How to Backup iPhone (iOS): iCloud Backup
iCloud is Apple’s integrated cloud service and offers a seamless backup solution for iPhones.
How to Set Up Automatic iCloud Backup:
- Connect to Wi-Fi: Ensure your iPhone is connected to a stable Wi-Fi network.
- Go to Settings: Open the “Settings” app.
- Tap on your name: This is at the very top of the Settings menu.
- Tap on iCloud:
- Tap on iCloud Backup:
- Toggle iCloud Backup ON: If it’s not already enabled, switch the toggle to green.
- Tap Back Up Now (Optional): To perform an immediate backup.
iCloud automatically backs up your iPhone when it’s locked, connected to Wi-Fi, and plugged into a power source. You get 5GB of free iCloud storage, which may be sufficient for some users. If you need more space, you can easily upgrade to iCloud+ for additional storage plans.
How to Backup Android Phone: Google One Backup
Google One is Google’s subscription service that provides expanded storage and additional benefits, including comprehensive phone backup for Android devices. Many Android phones come with Google One backup enabled by default.
How to Check and Set Up Google One Backup:
- Connect to Wi-Fi: Ensure your Android phone is connected to a stable Wi-Fi network.
- Open the Settings app:
- Tap System: (May vary depending on your phone manufacturer, look for “Backup” or “Google”).
- Tap Backup:
- Verify Backup by Google One is ON: If it’s not, toggle it on.
- Tap Back up now (Optional): To perform an immediate backup.
- Configure Backup Details (Optional): Tap “Backup details” to choose what gets backed up (Apps, Photos & videos, SMS messages, Call history, Device settings).
Google One typically offers 15GB of free storage shared across Gmail, Google Drive, and Google Photos. Similar to iCloud, you can purchase more storage if needed.
Alternate Backup Method: Local Backup to Your Computer
While cloud backup offers convenience, backing up your phone to a computer provides an alternative and can be useful for a full device backup or when internet access is limited.
Backing Up iPhone to a Computer (Mac or PC)
You can use Finder (on macOS Catalina and later) or iTunes (on older macOS versions and Windows) to back up your iPhone to your computer.
Using Finder (macOS Catalina and later):
- Connect your iPhone to your Mac: Use a USB cable.
- Open Finder: You should see your iPhone listed in the sidebar under “Locations.”
- Select your iPhone:
- Click “Back Up Now”: Under the “General” tab.
- Encrypt Local Backup (Recommended): Check the box “Encrypt local backup” and create a password to protect sensitive data.
Using iTunes (Older macOS or Windows):
- Download and Install iTunes: If you don’t have it already.
- Connect your iPhone to your computer: Use a USB cable.
- Open iTunes:
- Click the iPhone icon: Near the top left of the iTunes window.
- Under “Backups,” select “This computer”:
- Click “Back Up Now”:
- Encrypt Local Backup (Recommended): Check the box “Encrypt iPhone backup” and create a password.
Backing Up Android to a Computer (Mac or PC)
Backing up an Android phone to a computer can involve transferring files manually or using the manufacturer’s software.
Manual File Transfer (for media and documents):
- Connect your Android phone to your computer: Use a USB cable.
- Select “Transfer files” or “MTP” mode: On your phone when prompted.
- Open File Explorer (Windows) or Finder (Mac): Your phone should appear as a connected device.
- Browse the phone’s storage: Copy and paste the files you want to back up to a folder on your computer.
Using Manufacturer Software (e.g., Samsung Smart Switch, Huawei HiSuite):
Many Android manufacturers offer dedicated software for managing and backing up your device. These tools often provide more comprehensive backup options than manual file transfer. Download and install the software from your phone manufacturer’s website and follow the on-screen instructions.
Video – How to backup your phone to Google Drive?
Note: Applications not downloaded from the Android Market will need to be reinstalled manually.
Many device manufacturers offer data backup services. Such as Samsung has a cloud service that will automatically backup all your settings, apps and data.
Setting Up Automatic Backups
iPhone (iCloud): As described earlier, enabling “iCloud Backup” in your iPhone settings ensures automatic backups occur regularly when your phone meets the specified conditions (locked, Wi-Fi, power).
Android (Google One): Similarly, enabling “Backup by Google One” in your Android settings allows for automatic backups. You can also customize what data is included in the automatic backup.
Third-Party Backup Apps: A Comparison
While built-in options are often sufficient, third-party backup apps can offer additional features or cross-platform compatibility. Here’s a comparison of some popular options to backup your phone:
| Feature | Acronis Mobile | iMazing (iOS) | Wondershare MobileTrans (iOS & Android) | My Backup Pro (Android) |
|---|---|---|---|---|
| Platforms | iOS, Android | iOS, macOS, Windows | iOS, Android, Windows, macOS | Android |
| Cloud Backup | Acronis Cloud (paid), other cloud services | No direct cloud backup, but can backup to cloud drives on computer | Yes (various cloud services) | Yes (various cloud services) |
| Local Backup | Yes (to computer or external storage) | Yes (to Mac or PC) | Yes (to computer) | Yes (to SD card or local storage) |
| Automatic Backup | Yes | Yes (scheduled backups) | Yes | Yes (scheduled backups) |
| Selective Backup | Yes | Yes | Yes | Yes |
| Additional Features | Anti-malware, secure zone, Wi-Fi protection | App management, transferring data between devices | Phone transfer, WhatsApp transfer, restore from cloud | SMS/MMS backup & restore, call log backup & restore |
| Cost | Subscription-based | One-time purchase or subscription | One-time purchase or subscription | One-time purchase |
Note: This table provides a general overview. Features and pricing may vary. Always research and choose an app that best suits your individual needs and budget.
Restoring Data from a Backup
The restoration process varies depending on the backup method.
Restoring from iCloud Backup (iPhone):
- Erase All Content and Settings: On your new or reset iPhone, go to Settings > General > Transfer or Reset iPhone > Erase All Content and Settings.
- Follow Setup Assistant: During the setup process, when you reach the “Apps & Data” screen, tap “Restore from iCloud Backup.”
- Sign in to iCloud: Enter your Apple ID and password.
- Choose a Backup: Select the most recent or relevant backup from the list.
- Wait for Restoration: Your iPhone will download and restore your data.
Restoring from Google One Backup (Android):
- Follow Setup Assistant: On your new or reset Android phone, sign in with your Google account during the setup process.
- Choose to Restore: The setup assistant will ask if you want to restore data from a backup. Tap “Yes.”
- Select a Backup: Choose the backup you want to restore.
- Select Data to Restore: You can usually choose which types of data to restore (apps, photos, contacts, etc.).
- Wait for Restoration: Your phone will download and restore your data.
Restoring from a Computer Backup (iPhone – Finder/iTunes):
- Connect your iPhone to your computer: Use the USB cable you used for the backup.
- Open Finder or iTunes:
- Select your iPhone:
- Click “Restore Backup”: (In Finder under the “General” tab, in iTunes under the “Summary” tab).
- Choose the Backup: Select the backup you want to restore.
- Enter Backup Password (if encrypted):
- Click “Restore”: Wait for the process to complete.
Restoring from a Computer Backup (Android – Manual Transfer or Manufacturer Software):
- Manual Transfer: Copy the backed-up files from your computer back to the appropriate folders on your phone.
- Manufacturer Software: Use the restore function within the manufacturer’s backup software and follow the instructions.
Restoring from Third-Party Apps:
The restoration process for third-party apps will vary depending on the specific app. Refer to the app’s documentation for detailed instructions.
Understanding Cloud Storage Plans: Free vs. Paid
While both Apple (iCloud) and Google (Google One) offer convenient cloud backup solutions, it’s crucial to understand the differences between their free and paid storage tiers. This will help you decide if an upgrade is necessary for your backup needs.
iCloud (Apple)
- Free Tier (5GB): Apple provides a modest 5GB of free iCloud storage. For many users, especially those with numerous photos, videos, or multiple Apple devices (iPhone, iPad, Mac), this quickly becomes insufficient. The 5GB is shared across iCloud Backup, iCloud Drive (for documents), iCloud Photo Library, and iCloud Mail.
- Paid Tiers (iCloud+): iCloud+ offers expanded storage plans (e.g., 50GB, 200GB, 2TB) for a monthly fee. Beyond just storage, iCloud+ plans include premium features like:
- iCloud Private Relay: Helps protect your Browse activity.
- Hide My Email: Allows you to create unique, random email addresses to keep your personal email private.
- HomeKit Secure Video support: For recording and storing security camera footage.
- Family Sharing: Higher-tier plans can be shared with up to five other family members.
- Is it worth it? If you take many photos and videos, rely heavily on Apple’s ecosystem, or manage multiple Apple devices, upgrading to a paid iCloud+ plan is highly recommended to ensure continuous and complete backups.
Google One Backup (Google)
- Free Tier (15GB): Google provides a more generous 15GB of free storage with every Google account. This storage is shared across Google Drive, Gmail, Google Photos (for photos uploaded in “Storage saver” quality), and Google One phone backups. This might be sufficient for users with fewer photos or those who use Google Photos’ free storage saver option.
- Paid Tiers (Google One Plans): Google One offers various paid plans (e.g., 100GB, 200GB, 2TB) for a monthly or annual subscription. These plans come with several benefits:
- Expanded Storage: For all your Google services.
- Google Photos Original Quality: Allows you to back up photos and videos in their original resolution without counting against free storage limits (for some older Pixel devices, check current Google Photos policy).
- Google Experts Support: Access to Google experts for help with Google products.
- VPN by Google One: (Included with 2TB plans and higher in select countries) Offers an encrypted connection for enhanced online privacy.
- Family Sharing: Plans can be shared with up to five other family members.
- Additional Member Benefits: Perks like Google Play credit, discounts, etc.
- Is it worth it? If you frequently take photos and videos at original quality, store many files in Google Drive, or utilize multiple Google services, a Google One paid plan offers excellent value and ensures your backups are always current.
Specific App Backups: WhatsApp and More
While your main phone backup handles most of your device data, some popular apps manage their own data independently, especially chat histories and specific app configurations. It’s vital to ensure these are also backed up.
WhatsApp is a prime example of an app with its own dedicated backup mechanism. Your chat history, including photos and videos sent via WhatsApp, can be backed up to your cloud drive.
- For iPhone (iCloud Drive):
- Ensure you are signed into iCloud with your Apple ID.
- Open WhatsApp.
- Go to Settings > Chats > Chat Backup.
- Tap “Back Up Now” to perform an immediate backup.
- You can also set up “Auto Backup” frequency (Daily, Weekly, Monthly) and choose whether to include videos.
- Important: This backup counts towards your iCloud storage limit.
- For Android (Google Drive):
- Ensure you are signed into your Google account on your phone.
- Open WhatsApp.
- Go to Settings > Chats > Chat backup.
- Tap “Back Up Now” to perform an immediate backup.
- Tap “Back up to Google Drive” to set the backup frequency (Never, Only when I tap “Back up”, Daily, Weekly, Monthly) and select the Google account you want to use. You can also choose to include videos.
- Important: This backup counts towards your Google Drive storage limit.
Other Popular Apps
Many other apps, especially those dealing with personal notes, documents, or specific settings, might offer their own in-app backup or sync features:
- Note-Taking Apps: Apps like Evernote, OneNote, or specific journaling apps often have their own cloud sync or export options.
- Password Managers: Apps like LastPass, 1Password, or Bitwarden use their own secure cloud sync. Ensure you know your master password and have any recovery codes stored safely.
- Authenticator Apps (e.g., Google Authenticator, Microsoft Authenticator, Authy): This is CRITICAL. Standard phone backups often do not back up the secret keys for your two-factor authentication (2FA) codes.
- Solution: Some authenticator apps like Authy offer encrypted cloud sync for your 2FA tokens. For apps like Google Authenticator that don’t, you must back up your 2FA recovery codes or set up 2FA again manually on your new device. Losing access to these can lock you out of your accounts permanently.
Always check the individual app’s settings for backup, sync, or export options to ensure your most critical data is protected.
Security and Privacy Considerations for Backups
While convenience is key, the security and privacy of your backed-up data are paramount. Understanding how your data is protected is crucial.
- Encryption is Your Friend:
- Local Backups (to PC): When backing up to your computer via Finder or iTunes, always choose the option to “Encrypt local backup.” This adds a password layer that scrambles your data, preventing unauthorized access. Without encryption, anyone with access to your backup file could potentially view your sensitive information, including saved Wi-Fi passwords and health data. Choose a strong, memorable password.
- Cloud Backups (iCloud, Google One): Major cloud providers like Apple and Google employ robust encryption measures to protect your data both in transit (as it’s uploaded) and at rest (when stored on their servers). While the specifics of their encryption models vary, they are designed to safeguard your information from unauthorized access.
- Strong Passwords and Two-Factor Authentication (2FA):
- Your Apple ID and Google account are the gateways to your cloud backups. Use strong, unique passwords for these accounts.
- Enable Two-Factor Authentication (2FA) on both your Apple ID and Google account. This adds an essential layer of security, requiring a second verification step (e.g., a code sent to another trusted device) even if someone obtains your password.
- Beware of Public Wi-Fi:
- Whenever possible, avoid performing backups over unsecured public Wi-Fi networks. These networks can be vulnerable to eavesdropping. Stick to your trusted home or work Wi-Fi, or use mobile data if necessary for smaller updates.
- Review What You Back Up:
- Periodically review the settings for your automatic backups (both cloud and local) to ensure you are only backing up what you intend to. This can help manage storage space and reduce the amount of potentially sensitive data stored.
- Be Mindful of Third-Party Apps:
- If using third-party backup apps, ensure they come from reputable developers and understand their privacy policies. Some apps might store your data on their own servers or use third-party cloud services.
The Importance of an Off-Site Backup Strategy
While primary cloud backups and alternate local computer backups are excellent starting points, a truly robust data protection strategy incorporates the concept of an “off-site” backup. This guards against catastrophic local events that could compromise all your immediate backups.
The 3-2-1 Backup Rule: A Gold Standard
Many data security experts recommend the 3-2-1 Backup Rule:
- 3 copies of your data: This includes your primary data (on your phone) and at least two backups.
- 2 different types of media: Store your backups on at least two different storage types (e.g., your phone itself, a cloud service, an external hard drive).
- 1 copy off-site: Keep at least one copy of your data in a different physical location than your primary device.
Why Off-Site Matters
Imagine a scenario where your phone is lost or damaged, and at the same time, your home computer (containing your local backup) is also affected by a fire, flood, or theft. In such cases, having an off-site backup becomes your last line of defense.
How Cloud Backups Serve as Off-Site Solutions
Cloud backup services like iCloud and Google One are excellent for off-site storage. Your data is stored securely on remote servers, meaning it’s protected even if something happens to your physical phone and computer.
Other Off-Site Options:
- External Hard Drives/USB Drives: If you make a local backup to your computer, you can then copy that backup file to an external hard drive. Periodically take this external drive to another secure location, such as a friend’s house, a safety deposit box, or your workplace.
- Online Storage Services (Complementary): While your primary cloud backup handles device data, you can also use services like Dropbox, Microsoft OneDrive, or similar platforms to manually upload and store critical documents, photos, or videos that you want to have accessible from anywhere and serve as an additional off-site copy.
By diversifying your backup locations and types, you create a resilient system that can withstand almost any data loss scenario, providing ultimate peace of mind.
Before You Sell or Trade Your Old Phone: Essential Steps
Before you pass on your old smartphone, it’s crucial to take specific steps to ensure your personal data is securely transferred to your new device and completely erased from the old one. Simply deleting files isn’t enough; a factory reset is necessary.
- Backup Your Old Phone (Crucial!):
- Perform a final, complete backup of your old phone using your preferred method (iCloud, Google One, or local computer backup). This ensures you have the most up-to-date copy of your data before you erase anything.
- Verify the backup: If possible, briefly check your cloud storage or computer backup to confirm that the recent backup is indeed there and accessible.
- Transfer Data to Your New Phone:
- Once your old phone is backed up, you can now use that backup to set up your new phone.
- iPhone (Quick Start): If setting up a new iPhone, use Apple’s “Quick Start” feature to directly transfer data from your old iPhone to your new one (requires both phones to be near each other).
- Android (Manufacturer Tools/Google Restore): Android phones often have manufacturer-specific tools (e.g., Samsung Smart Switch, OnePlus Switch) that facilitate direct phone-to-phone data transfer. Otherwise, during the new phone’s setup, you can restore from your Google One backup.
- Sign Out of All Accounts:
- Apple ID (iPhone): Go to Settings > Your Name > Sign Out. You’ll need to enter your Apple ID password. This step is critical as it removes Activation Lock, allowing the next owner to use the device.
- Google Account (Android): Go to Settings > Accounts > Google > Tap on your account > Remove account. Remove all Google accounts linked to the phone. For some devices, you might need to go to Settings > Accounts and backup > Manage accounts. Removing accounts also disables factory reset protection, which prevents theft by requiring your Google account credentials after a factory reset.
- Perform a Factory Reset:
- This step securely wipes all your personal data from the device and restores it to its original factory settings. Do not skip this step!
- For iPhone:
- Go to Settings > General > Transfer or Reset iPhone.
- Tap “Erase All Content and Settings.”
- Confirm your decision and enter your passcode if prompted.
- The phone will erase all data and restart.
- For Android:
- Go to Settings > System > Reset options (the exact path may vary by manufacturer, e.g., “General management” or “About phone”).
- Tap “Erase all data (factory reset).”
- Read the warning carefully, confirm your decision, and enter your PIN/pattern if prompted.
- The phone will erase all data and restart.
- Remove SIM Card and External Storage:
- Don’t forget to remove your physical SIM card from the phone’s tray.
- If your Android phone uses a microSD card, remove it as well. It may contain personal photos or files not included in your phone backup.
By following these steps, you ensure that your personal information is completely removed from your old device, protecting your privacy and preparing the phone for its next owner.
Frequently Asked Questions (FAQ) for Backup your Phone
General Backup Questions
Q: How often should I back up my phone? A: Ideally, you should back up your phone regularly. For automatic cloud backups, once a day or every few days is usually sufficient. If you take many photos or have important new data, consider initiating a manual backup more frequently.
Q: What’s the difference between a backup and syncing data? A: A backup creates a comprehensive copy of your device’s data at a specific point in time, allowing you to restore the entire device to that state. Syncing, on the other hand, keeps data consistent across multiple devices. For example, syncing contacts means any change made on one device is reflected on others. While syncing is great for accessibility, it’s not a full disaster recovery solution like a backup.
Q: Does backing up my phone save everything? A: Most common backup methods (iCloud, Google One, computer backups) aim to save most of your personal data, including photos, videos, contacts, messages, app data (for apps that support it), device settings, and call history. However, some data might not be included, such as:
- Data that is already stored in the cloud (e.g., emails in Gmail, photos already uploaded to Google Photos with original quality).
- Downloaded apps themselves (only links to download them are usually saved, not the app binaries).
- DRM-protected content that cannot be transferred.
Q: Is cloud backup secure? A: Reputable cloud backup services like iCloud and Google One use strong encryption to protect your data. While no system is 100% foolproof, these services employ robust security measures to safeguard your information.
Q: Do I need Wi-Fi for cloud backup? A: Yes, for most cloud backup services, a stable Wi-Fi connection is highly recommended or often required for a full backup to avoid excessive mobile data usage and ensure a reliable transfer.
iPhone Backup Questions
Q: How much iCloud storage do I get for free? A: Apple provides 5GB of free iCloud storage. Many users find they need to upgrade to a paid iCloud+ plan for more storage, especially if they have many photos and videos.
Q: Can I back up my iPhone to an external hard drive? A: Yes, if you back up your iPhone to your computer via Finder or iTunes, you can then move or copy the backup files from your computer’s hard drive to an external hard drive. This adds an extra layer of redundancy.
Android Backup Questions
Q: How much Google One storage do I get for free? A: Google provides 15GB of free storage with a Google account, which is shared across Google Drive, Gmail, and Google Photos, including your phone backups.
Q: Will backing up my Android phone save my app data? A: Google One backup can save app data for many Android apps. However, not all apps support this, and some app data might require specific in-app backup options.
Common Problems and Solutions to Backup your Phone
Problem: Backup Failed or Incomplete
Possible Causes:
- Insufficient Storage: Not enough space in your cloud account (iCloud, Google One) or on your computer’s hard drive.
- Poor Wi-Fi Connection: An unstable or weak Wi-Fi signal can interrupt the backup process.
- Low Battery: The phone’s battery might be too low, especially for automatic backups that require the device to be charging.
- Software Glitch: Temporary software bug on the phone or computer.
- Corrupted Data: Specific files or data on your phone might be corrupted, causing the backup to fail.
Solutions:
- Check Storage:
- Cloud: Go to your phone’s settings to check your available iCloud or Google One storage. Upgrade if necessary.
- Computer: Ensure your computer’s hard drive has enough free space.
- Verify Wi-Fi: Connect to a strong and stable Wi-Fi network. Try restarting your router.
- Charge Your Phone: Plug your phone into a power source, especially for automatic cloud backups.
- Restart Devices: Restart your phone, computer, and router. This can often resolve temporary glitches.
- Update Software: Ensure your phone’s operating system (iOS or Android) and any backup software (iTunes, Finder) are up to date.
- Try Again: Attempt the backup again after troubleshooting.
- Exclude Large Files (Cloud): For cloud backups, review what’s being backed up. You might have very large videos or files that are consuming too much space. Consider offloading them manually or deselecting them from the backup if they’re not critical.
- Reset Network Settings (Phone): On your phone, go to network settings and reset them. (Note: This will erase saved Wi-Fi passwords).
Problem: Backup Taking Too Long
Possible Causes:
- Large Data Volume: Your phone contains a lot of data (especially high-resolution photos and videos).
- Slow Internet Speed: Your Wi-Fi connection is slow.
- First-Time Backup: The initial backup always takes the longest as it transfers all data. Subsequent incremental backups are usually much faster.
- Background Activity: Other network-intensive apps running in the background.
Solutions:
- Be Patient: For large initial backups, it can take hours or even overnight, depending on your data size and internet speed.
- Optimize Wi-Fi: Ensure you have the best possible Wi-Fi signal. If possible, move closer to your router.
- Close Background Apps: Close any unnecessary apps running in the background.
- Charge Phone and Leave Overnight: Plug in your phone and leave it connected to Wi-Fi overnight for the backup to complete.
Problem: Cannot Find My Backup
Possible Causes:
- Incorrect Account: You’re signed into a different iCloud or Google account than the one used for the backup.
- Backup Location: The backup was saved to a different computer or an unexpected folder.
- Deleted Backup: The backup might have been accidentally deleted.
Solutions:
- Verify Account: On your new or reset phone, ensure you’re signed into the exact Apple ID or Google account that was used for the backup.
- Check All Computers: If you backed up to a PC, check all computers you might have used.
- Finder/iTunes Backup Location:
- macOS: By default, Finder backups are in
~/Library/Application Support/MobileSync/Backup/(you can access Library by holdingOptionkey and clickingGoin Finder menu bar). - Windows: iTunes backups are typically in
%APPDATA%\Apple Computer\MobileSync\Backup\orC:\Users\[Your Username]\AppData\Roaming\Apple Computer\MobileSync\Backup\.
- macOS: By default, Finder backups are in
- Cloud Service Check: Log into iCloud.com or Google One website to see if your backup appears there.
Problem: Cannot Restore from Backup
Possible Causes:
- Incompatible iOS/Android Version: The backup was made on a newer iOS/Android version than the device you’re trying to restore to.
- Corrupted Backup: The backup file itself might be corrupted.
- Incorrect Password (Encrypted Backup): For encrypted local backups, the password is case-sensitive and must be exact.
Solutions:
- Update Device Software: Before restoring, ensure your new or reset phone is running the latest available iOS or Android version for that device.
- Try a Different Backup: If you have multiple backups, try restoring from an older one.
- Verify Password (Local Backups): Double-check the password for encrypted computer backups. There’s no way to recover an iTunes/Finder backup password if forgotten.
- Contact Support: If all else fails, contact Apple Support or Google Support for assistance.
Conclusion
Backing up your phone might seem like a chore, but it’s an essential step in protecting your valuable digital information. By understanding the different methods available and choosing a strategy that fits your needs and habits, you can ensure that your precious memories, important contacts, and crucial data are safe and easily recoverable should the unexpected happen. Make regular backups a part of your routine and enjoy the peace of mind that comes with knowing your digital life is secure. of mind knowing your important data is securely backed up.
Additional helpful information:
- Here are instructions for doing a special back up of photos and videos – Google Photos For iPhone and Android Users
- Don’t lose your data – How to Recover Data From a Lost Phone?
External Authoritative Links
For iPhone
- Apple Support: The official source for all things iPhone. These articles provide comprehensive, step-by-step instructions for backing up your device using either iCloud or your computer (Mac or PC).
For Android
Back up and restore data or files on your Galaxy phone or tablet
Google Help/Google One: The most authoritative source for Android devices is Google itself. These guides explain how to use the built-in Google Backup feature to save your data to Google Drive, as well as how to manage and restore your backups.
Back up or restore data on your Android device
Back up your device with Google One
Samsung Support: If you have a Samsung Galaxy device, the manufacturer’s official support page is an excellent resource for backing up and restoring data, often providing instructions for their specific tools like Smart Switch.