Static IP Setup on iPhone & Android
A static IP address can be incredibly useful for specific tasks on your mobile devices, providing a stable and consistent connection. While most users operate with dynamic IPs, understanding the distinction and how to configure a static one can unlock new functionalities and enhance your network experience. This article gives detailed instructions for doing a Static IP Setup on both iPhone and on Android phones.
A static IP address remains constant, unlike a dynamic IP which can change. For most everyday internet use (Browse, social media), a dynamic IP assigned by your router via DHCP (Dynamic Host Configuration Protocol) is perfectly adequate and convenient. However, for certain applications where consistent connectivity is crucial, a static IP offers significant advantages.
Dynamic vs. Static IP: What’s the Difference?
Dynamic IP:
- Assigned by: DHCP server on your router or ISP.
- Changes: Can change periodically (e.g., when your router reboots, or after a lease expires).
- Pros: Automatically assigned, no manual configuration needed, efficient use of IP addresses within a network.
- Cons: Not ideal for services requiring a fixed address as the IP can change, potentially disrupting access.
Static IP:
- Assigned by: Manually configured on the device or reserved on the router.
- Changes: Remains the same unless manually altered.
- Pros: Consistent and reliable, ideal for remote access and hosting services.
- Cons: Requires manual configuration, potential for IP conflicts if not managed carefully, may incur extra cost from ISP for public static IPs.
Why Do You Need a Static IP? Examples of Use Cases
While less common for mobile phones, a static IP can be beneficial in several scenarios:
- Remote Access: If you want to access your phone’s files or services from another device outside your home network (e.g., a personal cloud server running on your phone, though this is rare), a static IP ensures you can always find it at the same address.
- Hosting Services: Although not typical for mobile devices, if you were to host a small web server, FTP server, or even a game server directly on your phone (for development or testing purposes), a static IP would be essential for others to consistently connect.
- IP Camera Monitoring: If you have IP cameras on your local network and want to view their feed on your phone when away from home, some configurations might benefit from your phone having a static IP within the local network for easier routing.
- Network Troubleshooting: For advanced users, having a static IP on your phone can simplify network diagnostics, as you know its exact address within the network.
- Specific App Requirements: Some specialized applications or enterprise solutions might require devices to have a static IP for proper functionality or security.
How to do a Static IP Setup on Your Mobile Device
Before you begin, you’ll need the following information from your router’s network settings:
- Router’s IP Address (Default Gateway): This is typically
192.168.1.1or192.168.0.1, but it can vary. You can usually find this by checking your computer’s network settings (on Windows, useipconfigin Command Prompt; on Mac, check Network Preferences). - Subnet Mask: Commonly
255.255.255.0. - DNS Server IP Addresses: You can use your router’s IP address as the primary DNS, or public DNS servers like Google DNS (
8.8.8.8and8.8.4.4) or Cloudflare DNS (1.1.1.1and1.0.0.1). - An Available IP Address: Choose an IP address within your router’s subnet range but outside the range used by your router’s DHCP server to avoid conflicts. For example, if your router uses
192.168.1.1, and its DHCP range is192.168.1.100to192.168.1.200, you could choose192.168.1.10for your static IP.
Important Note: These instructions are for setting a private static IP address within your local Wi-Fi network. You generally cannot set a public static IP address for your mobile device through its settings; that’s usually a service provided by your Internet Service Provider (ISP) and applies to your entire home network.
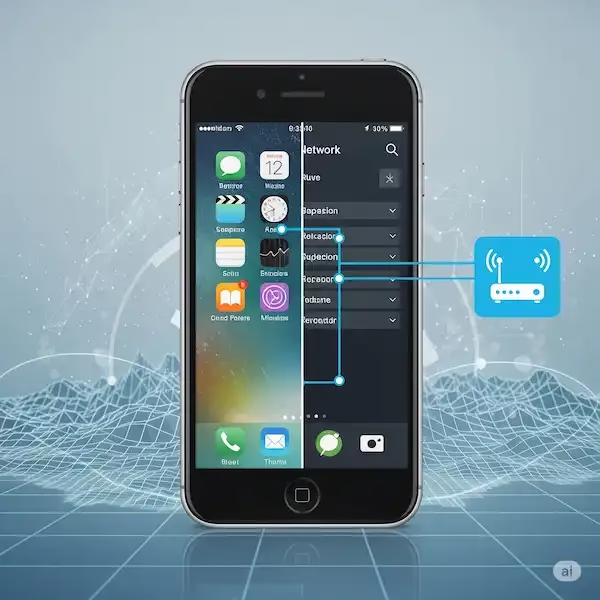
Static IP Setup For iPhone (iOS)
- Open Settings: Tap the “Settings” app.
- Go to Wi-Fi: Tap on “Wi-Fi.”
- Tap the “i” Icon: Find the Wi-Fi network you are connected to and tap the blue “i” icon next to its name.
- Configure IP: Scroll down and tap on “Configure IP.”
- Select “Manual”: By default, it will be set to “Automatic (DHCP)”. Choose “Manual.”
- Enter IP Details:
- IP Address: Enter the static IP address you’ve chosen (e.g.,
192.168.1.10). - Subnet Mask: Enter your subnet mask (e.g.,
255.255.255.0). - Router: Enter your router’s IP address (Default Gateway) (e.g.,
192.168.1.1).
- IP Address: Enter the static IP address you’ve chosen (e.g.,
- Add DNS Servers (Optional but Recommended):
- Tap “Add Server” under the DNS Servers section.
- Enter your preferred DNS server IP addresses (e.g.,
8.8.8.8and8.8.4.4). You can remove any automatically assigned DNS servers by tapping the minus sign.
- Save: Tap “Save” in the top right corner.
Your iPhone will now attempt to use this static IP address on this specific Wi-Fi network.
Static IP Setup For Android
(Note: Steps may vary slightly depending on your Android version and phone manufacturer.)
- Open Settings: Tap the “Settings” app.
- Go to Network & Internet / Connections: Tap on “Network & internet” or “Connections” (on Samsung phones).
- Tap on Wi-Fi: Select “Wi-Fi.”
- Long-press or Tap on Current Network:
- Option 1 (Typical): Tap the gear icon next to your connected Wi-Fi network, or long-press on the network name.
- Option 2 (Older versions): You might need to tap “Modify network” or “Manage network settings.”
- Access Advanced Options: Look for “Advanced options,” “IP settings,” or “IP settings (Advanced).”
- Change IP Settings to “Static”:
- Tap the dropdown menu next to “IP settings” (it will likely be set to “DHCP”).
- Select “Static.”
- Enter IP Details:
- IP Address: Enter the static IP address you’ve chosen (e.g.,
192.168.1.10). - Gateway: Enter your router’s IP address (Default Gateway) (e.g.,
192.168.1.1). - Network prefix length: This is the CIDR notation for your subnet mask. For
255.255.255.0, it’s24. - DNS 1 & DNS 2: Enter your preferred DNS server IP addresses (e.g.,
8.8.8.8for DNS 1,8.8.4.4for DNS 2).
- IP Address: Enter the static IP address you’ve chosen (e.g.,
- Save: Tap “Save” or the checkmark icon to apply the changes.
Your Android device will now use the specified static IP for this Wi-Fi network.
Helpful Tips for doing a Static IP Setup
- Check Router’s DHCP Range: Always check your router’s settings to identify its DHCP range. Assigning a static IP outside this range prevents conflicts. Many routers have a section for “DHCP Server” or “LAN settings” where this information is available.
- Reserve IP on Router (Recommended): Instead of setting a static IP on your phone, a more robust method is to “reserve” an IP address for your phone’s MAC address within your router’s DHCP settings. This way, your phone is still set to “DHCP” but the router will always assign it the same IP. This prevents conflicts and makes network management easier, especially if you connect to multiple networks.
- Document Your Settings: Keep a record of the static IP addresses you assign to devices to avoid accidentally assigning the same IP to different devices.
- Test Connectivity: After setting a static IP, verify that your device can still access the internet and other network resources.
When to Use a Static IP vs. DHCP Reservation
While both methods achieve a “static” IP for your device, there’s a key difference:
- Client-Side Static IP (Manual on Phone): The device requests that specific IP. If that IP is already taken by another device (e.g., due to a previous DHCP assignment or another static configuration), you’ll get an IP conflict and won’t be able to connect. It also means if you connect to a different Wi-Fi network, your phone will try to use that static IP, which likely won’t work on the new network, requiring you to switch back to DHCP or configure a new static IP for that network.
- Router-Side DHCP Reservation: Your phone is still set to “DHCP,” but you tell the router to always assign a specific IP address to your phone’s unique MAC address. This is generally preferred as the router manages the assignments, preventing conflicts and allowing your phone to seamlessly connect to other networks without manual IP configuration changes.
For mobile devices, router-side DHCP reservation is often the more convenient and robust solution if your primary goal is a consistent IP address on your home network.
Video – How to do a static IP setup on Android phones and tablets?
Here are some additional helpful tips to do a Static IP setup:
- Make sure that the IP address that you choose is not already in use by another device on your network.
- If you are not sure what subnet mask or gateway IP address to use, contact your network administrator.
- If you are using a VPN, you will need to disable it before setting up a static IP address.
- Once you have set up a static IP address, you may need to restart your device.
- Make sure that you have entered the correct information for the static IP address, gateway, network prefix length, and DNS servers.
- Restart your Phone.
- Restart your router.
- Contact your network administrator or internet service provider for assistance.
Frequently Asked Questions (FAQ) about doing a Static IP Setup
Q: Will setting a static IP make my internet faster? A: No, setting a static IP generally does not affect your internet speed. Its primary benefit is consistency and reliability for specific network services.
Q: Do I need a public static IP for my phone? A: For most users, no. Public static IPs are usually for servers accessible from the internet. The instructions above are for setting a private static IP within your local network. Your ISP provides your public IP, which is usually dynamic for home users.
Q: What if I connect to a different Wi-Fi network with a static IP configured? A: If you manually set a static IP on your phone, it will try to use that IP on any network you connect to. This will likely cause connection issues on other networks unless they happen to have the exact same network configuration and the chosen IP is available. You’ll need to switch back to DHCP or reconfigure the static IP for each new network. This is a significant reason why DHCP reservation on your router is often preferred.
Q: How do I find my MAC address to reserve an IP on my router? A: * iPhone: Settings > General > About > Wi-Fi Address. * Android: Settings > About phone > Status information > Wi-Fi MAC address (location may vary).
Q: Can I use any IP address I want? A: No. The IP address must be within the same subnet as your router and not conflict with other devices or your router’s DHCP range.
Common Problems and Solutions about doing a Static IP Setup
Solution: Re-enter and save the static IP settings. If the issue persists, consider rebooting your router and phone, or if possible, use the router-side DHCP reservation method.you specified.
No Internet Connectivity After Setting Static IP:
Problem: Incorrect IP address, subnet mask, gateway, or DNS servers.
Solution: Double-check all entered values against your router’s settings. Ensure the static IP you chose is outside your router’s DHCP range. Revert to DHCP to confirm internet connectivity, then try setting the static IP again carefully.
IP Address Conflict Detected:
Problem: Another device on your network is already using the IP address you assigned.
Solution: Choose a different, unused IP address within your network’s subnet. The best way to avoid this is to check your router’s DHCP client list to see what IPs are currently assigned, and then pick an IP outside that range (or use DHCP reservation on the router).
Cannot Save Static IP Settings:
Problem: Often due to incorrect formatting or missing information in one of the fields.
Solution: Ensure all required fields (IP address, subnet mask, gateway, DNS) are filled correctly and in the proper format.
Phone Reverts to DHCP After Reboot/Disconnect:
Problem: You didn’t save the settings properly, or there’s a software glitch.
For details on how to change the DNS on Android – How to change the DNS on Android


")


")
")


