Key Takeaways
- What are secret diagnostic codes on mobile phones?Secret diagnostic codes, often called USSD (Unstructured Supplementary Service Data) or factory test strings, are special key sequences entered into the phone dialer to bypass standard software menus and launch deep hardware diagnostic interfaces directly on the processor level.
- How do you trigger factory testing menus on major Android devices?On Samsung Galaxy devices, opening the phone dialer app and typing #0# automatically triggers the hardware diagnostic matrix without pressing the call button, while Google Pixel and Motorola phones typically use ##4636## or brand-specific strings.
- Can you check exact battery cycle counts and capacity loss without third-party apps?Yes, typing brand-specific diagnostic strings or extracting native system bug reports exposes raw hardware logs, including exact battery cycle counts, design capacity, charge status, and remaining health metrics directly from the power management integrated circuit.
- Is it possible to run hardware diagnostic codes on iPhones?While Apple restricts raw diagnostic overlays to internal technician modes like Field Test Mode (3001#12345#), users can run complete native hardware diagnostics by turning off the device and holding both volume buttons while connecting to a power source.
- Why do some secret codes fail to trigger on certain carrier devices?Major cellular carriers frequently disable hidden OEM dialer strings in custom firmware builds to prevent end users from modifying underlying network bands, cellular parameters, or factory calibration data.
How to Access Secret Hardware Diagnostic Codes on Android for Complete Device Health?Smartphone dial pad displaying secret hardware diagnostic codes
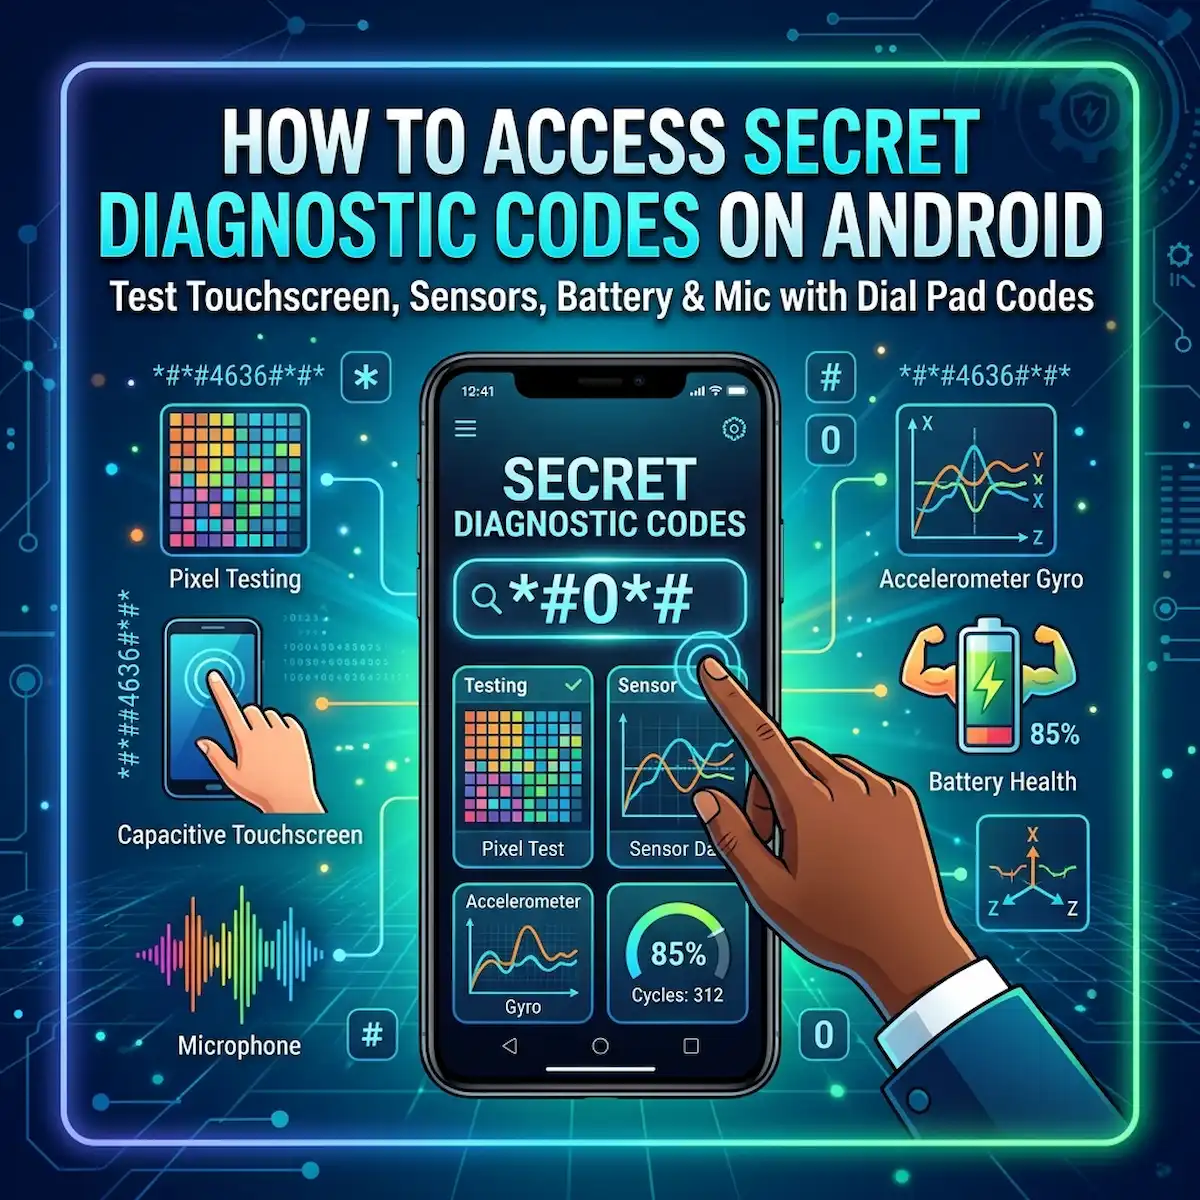
Every mobile device running the Android operating system contains hidden factory test modes built directly into its baseband firmware. Knowing how to access secret diagnostic codes allows hardware technicians, refurbishers, and everyday smartphone owners to bypass basic software settings and test physical components with absolute precision. When you input specific strings into your phone’s native dial pad, you send low-level commands directly to the hardware abstraction layer (HAL), initiating real-time diagnostic routines for OLED displays, capacitive touch grids, MEMS gyroscopes, multi-stage microphones, and power management circuits.
Whether you are inspecting a second-hand flagship before handing over cash, troubleshooting a ghost-touch issue after a heavy drop, or trying to figure out why your phone battery dies at 20% charge, these hidden interfaces yield instant truth. Rather than relying on third-party benchmarking applications filled with advertisements and telemetry trackers, using secret diagnostic codes gives you raw hardware readouts straight from the system kernel. For additional insights on mobile communication standards, developers often refer to resources provided by the Android Open Source Project.
Let’s dive into how these secret diagnostic codes operate across modern device chipsets, why carriers sometimes restrict them, and how you can run complete diagnostic battery tests, microphone checks, and screen recalibrations on both Android and iOS devices.
What Are Secret Hardware Diagnostic Codes and How Do They Function?
Secret diagnostic codes are structured sequences of asterisk, hash, and numeric digits processed by the telephony subsystem to execute hidden system software routines. When typed into the stock phone application, the operating system intercepts the input string through the Telephony Manager framework before it ever reaches the cellular network. Instead of placing an outgoing call, the dialer matches the entered sequence against an internal array of OEM factory test handlers, immediately launching dedicated activity windows that operate outside standard user settings.
These diagnostic protocols date back to early cellular standards established by bodies like the 3GPP Specification Group, where field engineers needed rapid access to network signal levels and baseband parameters without connecting specialized test equipment. Modern smartphone manufacturers retain and expand these secret diagnostic codes during assembly line calibration. During manufacturing, automated robotic arms use these exact commands to verify that every camera module, haptic engine, and proximity sensor meets strict engineering tolerances before leaving the factory floor.
| Diagnostic Code Category | Protocol Standard | Execution Target | Typical System Action |
|---|---|---|---|
| USSD Codes | Cellular Network (GSM/UMTS/LTE) | Carrier Switching Center | Queries real-time network data, account balance, or call forwarding rules via live tower connection |
| MMS / MMI Codes | Device Operating System | Local System Framework | Launches embedded OEM applications, build info summaries, or localized storage stats |
| OEM Direct HAL Codes | Vendor Firmware / Kernel | Hardware Abstraction Layer | Bypasses user space to run direct electrical tests on sensors, screen pixels, and audio circuits |
Understanding the distinction between these protocols prevents confusion when troubleshooting. While standard USSD codes require an active SIM card and cell tower communication, executing secret diagnostic codes occurs locally inside the device firmware. You can put your phone into flight mode, extract the SIM card entirely, and every OEM hardware diagnostic menu accessed via secret diagnostic codes will still function perfectly.
How Do You Test Touchscreens, Sensors, and Display Pixels on Samsung Galaxy Phones?Hardware diagnostic touchscreen testing grid screen
Samsung Galaxy smartphones feature one of the most comprehensive built-in diagnostic test menus available on any consumer device, accessible via the standard dialer pad. When you open the Samsung Phone app and enter the universal string *#0*#, the device instantly launches the hardware diagnostic matrix screen. This full-screen menu presents a grid of gray tiles, each dedicated to evaluating a specific micro-component wired to the motherboard using secret diagnostic codes.
To test your display for stuck pixels, burn-in, or subpixel color degradation, tap the Red, Green, and Blue tiles at the top of the matrix. The screen will illuminate in pure primary colors at full brightness. Inspect the panel carefully under bright lighting; any black spot indicates a dead pixel, while a faint residual outline of past app interfaces signals permanent AMOLED burn-in.
Testing the digitizer for dead touch zones requires selecting the Touch tile. This mode covers the display in a grid of clear square boxes connected by diagonal pathways. Pass your finger smoothly across every inch of the screen to turn every box green. If the green trail breaks or fails to register along specific lines, the capacitive touch layer has suffered physical trace damage—a common issue following screen replacements or localized impact drops, which can be further evaluated using secret diagnostic codes.
Samsung Diagnostic Flow:
- Open native Phone App.
- Type
*#0*#on key pad. - Launch Hardware Diagnostic Matrix.
- Select Sensor or Touch testing tiles.
- Complete visual and functional checks.
The Sensor module offers direct monitoring of all internal micro-electromechanical systems (MEMS). Selecting this option presents live graphic outputs for the accelerometer, gyroscope, magnetic sensor, barometer, and optical proximity sensor. Tapping Image Test under the magnetic sensor section displays a real-time compass calibration graph, while placing your palm over the top speaker assembly during the proximity test causes the screen to illuminate green and vibrate, confirming that the infrared distance sensor is fully operational through secret diagnostic codes.
Which Secret Codes Work Across Pixel, Xiaomi, Motorola, and OnePlus Devices?
While Samsung utilizes a unified matrix command, other Android smartphone manufacturers employ distinct string formats tailored to their custom software skins and hardware abstraction layers. Pixel devices, Motorola phones, and several stock-adjacent Android implementations share standard Android testing frameworks, whereas brands like Xiaomi and OnePlus implement dedicated engineer modes activated by secret diagnostic codes.
If you are using a Google Pixel or Motorola device, opening the dialer and entering *#*#4636#*#* opens the hidden Testing menu. This interface is divided into three primary diagnostic hubs: Phone Information, Usage Statistics, and Wi-Fi Information. Within the Phone Information sub-menu, technicians can toggle internal radio bands, view real-time signal attenuation measured in dBm, evaluate signal-to-noise ratios (SNR), and force specific cellular modes such as NR Only (pure 5G) to isolate failing antenna modules using secret diagnostic codes.
Xiaomi devices running MIUI or HyperOS provide access to the Hardware Indicator Analysis menu (commonly known as the CIT menu) through the code *#*#6484#*#*. Tapping this command opens a sequential list of up to 40 individual component tests ranging from dual-speaker frequency sweeps to fingerprint reader optical alignment calibration accessible via secret diagnostic codes.
| Device Manufacturer | Primary Hardware Test Code | Battery & Info Code | Special Features Checked |
|---|---|---|---|
| Samsung Galaxy | *#0*# | *#0228# | Full display grid, vibration engine, magnetic compass, optical sensor |
| Google Pixel | *#*#4636#*#* | System Bug Report | Cellular radio bands, tower handover, Wi-Fi physical layer status |
| Xiaomi / Poco / Redmi | *#*#6484#*#* or *#*#64663#*#* | *#*#6485#*#* | Fingerprint optical check, dual speaker balance, IR blaster output |
| OnePlus | *#899# or *#*#4636#*#* | *#800# | Factory engineering mode, thermal throttling logs, camera sensor raw output |
| Motorola | *#*#4636#*#* | *#*#2486#*#* | CQATest engineering suite, display calibration, mic array phase check |
| Sony Xperia | *#*#7378423#*#* | *#*#7378423#*#* | Service menu, pressure sensor water-resistance test, stereo mic sweep |
How Can You Check Battery Health and Cycle Counts Without Third-Party Apps?Smartphone battery diagnostic metrics interface showing health and cycle count
Determining the true physical condition of a lithium-ion battery requires reading raw charge registers stored directly inside the Fuel Gauge Integrated Circuit (FGIC) on the battery protection board. Over months of usage, chemical degradation reduces maximum energy retention, but standard battery settings screens often hide actual degradation behind vague descriptors like “Good” or “Normal,” requiring secret diagnostic codes for deep audits.
To learn how to access secret diagnostic codes specifically for battery metrics, Samsung users can dial *#0228# to open the ADC Reading / Battery Status window. This screen reveals real-time voltage measurements down to the millivolt, current temperature readings in Celsius, and the exact State of Charge (Vo). If your device suffers from sudden shutdowns at 15% charge, tapping the Quick Start button at the bottom of this menu forces the operating system to recalibrate its fuel gauge lookup table against the battery’s current open-circuit voltage via secret diagnostic codes.
Battery Recalibration Step-by-Step:
- Charge device to 100% capacity.
- Open dial pad and enter
*#0228#. - Tap Quick Start button (Screen will lock briefly).
- Unlock phone and observe state of charge drop.
- Discharge fully to 0%, then recharge continuously to 100%.
For users on Google Pixel and modern Android operating systems, battery health metrics are logged continuously within system dumps. You can review detailed documentation on bug reports at the Android Developer Documentation. You can extract exact battery parameters without third-party utilities using these steps:
- Navigate to Settings and scroll down to About Phone.
- Tap Build Number seven times continuously until the screen confirms that Developer Options are active.
- Open System > Developer Options and select Take Bug Report.
- Choose Interactive Report and wait a few minutes for the log creation process to finish.
- Export or email the resulting archive to yourself, extract the text file named
bugreport-*.txt, and open it in any text editor. - Search the document for the term
healthdorbattery. - Locate the lines marked
mChargeCounter,mCycleCount, andmNominalCapacityto view your battery’s factory design capacity compared to its actual current milliamp-hour capacity as an alternative to secret diagnostic codes.
How Do You Run Real-Time Diagnostics on Microphones and Audio Circuits?
Microphone failures on modern mobile devices are frequently misunderstood because smartphones utilize multi-microphone arrays dedicated to distinct audio tasks. A typical device contains three to four separate MEMS microphones: a primary mic at the bottom for voice calls, a secondary mic at the top for active noise cancellation (ANC) and loudspeaker mode, a rear mic near the camera for video recording, and an earpiece mic for acoustic feedback suppression.
When a contact reports that they cannot hear you during normal phone calls, but speakerphone and voice notes work perfectly, the issue is restricted to the primary bottom microphone channel. Using secret diagnostic codes allows you to test each microphone in total isolation from software processing algorithms like echo cancellation and audio beamforming.
On Samsung devices via *#0*#, select the Receiver tile to test the upper speaker, or select Loopback to test microphone routing. Tapping RCV_1st_MIC routes audio captured directly by the bottom primary microphone straight to the top earpiece without applying noise-reduction filters. Speaking softly into the bottom port allows you to hear an uncompressed playback loop; clear audio confirms hardware functionality, whereas static, distortion, or silence points to a clogged microphone mesh or a failed MEMS component on the lower sub-board evaluated through secret diagnostic codes.
Microphone Test Routing Sequence:
- Mode 1 (Primary Mic): Captures audio via bottom port and outputs directly to earpiece speaker.
- Mode 2 (Secondary Mic): Captures audio via top noise-cancel port and outputs to main speaker.
- Mode 3 (Camera Mic): Captures audio via rear housing port and outputs to stereo speaker array.
On Sony Xperia devices, typing *#*#7378423#*#* opens the Service Tests menu. Navigating to Microphone, Secondary Microphone, and Stereo Mic Test allows you to monitor left and right audio input channels independently on a live decibel waveform graph using secret diagnostic codes. This precise test isolates whether a physical obstruction (such as pocket lint or dried adhesive) is blunting high-frequency reception on one specific microphone channel.
How Do Secret Hardware Diagnostics Work on iPhone Devices?Mobile technician testing microphone and audio circuitry on a smartphone
Apple takes a markedly different architectural approach to hardware diagnostic testing compared to Android device manufacturers. While Android leaves low-level test interfaces accessible inside the dialer app via standard OEM strings, Apple restricts full system diagnostic test screens to an external boot-level routine that communicates directly with Apple Support servers instead of relying on traditional secret diagnostic codes. However, iOS devices still retain a powerful hidden dialer tool called Field Test Mode.
Opening the Phone app on an iPhone, tapping the Keypad tab, and entering *3001#12345#* followed by the Call button launches the native iOS Field Test application. This hidden interface provides cellular engineers and network technicians with detailed telemetry on radio performance, cell tower handover parameters, and signal quality metrics, functioning similarly to secret diagnostic codes.
| iPhone Diagnostic Routine | Triggering Method | Target Hardware Metrics |
|---|---|---|
| Field Test Mode | Dialer Code: *3001#12345#* + Call | RRP, RSRQ, SINR, LTE/5G Band, Cell ID, Bandwidth |
| Native Diagnostics Suite | Button Combo: Hold Vol Up + Vol Down while plugging Lightning/USB-C cable | Display, Camera, TrueDepth, Audio, Battery Health |
| Sysdiagnose Logging | Button Combo: Hold Vol Up + Vol Down + Power for 1.5 seconds | Comprehensive system dump, thermal logs, crash traces |
To execute complete hardware diagnostics on an iPhone equivalent to Android’s secret diagnostic codes, you can trigger Apple’s self-service diagnostic boot mode by completing these steps:
- Power off your iPhone completely by holding the Side Button and Volume Down button, then sliding to power off.
- Wait 30 seconds to ensure all capacitors on the logic board have fully discharged.
- Press and hold both the Volume Up and Volume Down buttons simultaneously.
- While continuing to hold both volume buttons, connect the iPhone to a power adapter or computer using an official cable.
- Release the buttons when the Apple logo appears alongside text stating “Diagnostics Mode.”
- Connect the iPhone to a local Wi-Fi network when prompted on screen to allow the device to fetch testing suites directly from official verification servers. Learn more via Apple Official Support.
What Problem-Solution Scenarios Do Hardware Diagnostic Codes Resolve?
Understanding how to access secret diagnostic codes provides immediate troubleshooting solutions for common hardware failures that would otherwise require expensive repair shop visits. Below are real-world technical problems and their exact diagnostic solutions using native dial pad commands and secret diagnostic codes.
Scenario 1: Intermittent Touchscreen Unresponsiveness After a Screen Replacement
- Problem: A smartphone screen was recently replaced by a third-party repair shop. Tap inputs frequently drop while typing fast, and swipe gestures fail near the outer bezels.
- Solution: Open the dial pad and enter
*#0*#on Samsung or*#*#6484#*#*on Xiaomi. Select the Touch / Digitizer test using secret diagnostic codes. Trace your finger along the outermost perimeter boxes. If the boxes refuse to turn green along the extreme edges, the replacement screen uses a low-quality aftermarket digitizer ribbon cable with poor trace alignment. Presenting this visual test result to the repair technician proves the screen assembly itself is defective, bypassing arguments about software glitches.
Scenario 2: Suspected Proximity Sensor Failure During Calls
- Problem: Your face accidentally mutes or hangs up calls because the screen fails to turn off when held against your ear.
- Solution: Access the sensor test menu using secret diagnostic codes via
*#0*#and select Sensor. Locate the Proximity Sensor readout. Check the baseline value when the sensor is completely unobstructed. The value should sit at0(orADC: 0). Pass your hand over the top screen bezel. If the screen turns green, vibrates, and the value jumps to1or255, the physical sensor functions correctly. If the value stays permanently at255without your hand present, dust or misaligned optical adhesive inside the top bezel is blocking the sensor port.
Scenario 3: Audio Muffled on Speakerphone Calls
- Problem: Callers report clear voice reception during standard handset calls, but claim your voice sounds underwater or static-filled whenever you switch to hands-free speakerphone.
- Solution: Enter your brand’s diagnostic menu using secret diagnostic codes and navigate to the microphone test options. Select Sub Mic or Top Mic. Record a short sample speaking directly into the top pinhole microphone located next to the SIM tray. Listen to the raw, unprocessed audio playback loop. If you hear heavy static, clean the top pinhole port using a soft wooden toothpick and compressed air, then re-test to verify full frequency restoration.
Why Do Carrier Locks and Firmware Builds Block Secret Codes?
A common point of frustration for smartphone owners occurs when typing a valid secret diagnostic code into the dialer pad results in a blank screen, a quick flash followed by an immediate crash, or an error message stating “Connection problem or invalid MMI code.” This behavior rarely indicates a physical phone fault; rather, it is the direct result of carrier-level firmware customization or OEM software regional locks.
Major mobile operators frequently order custom firmware builds from device manufacturers. To minimize customer support tickets caused by users accidentally altering sensitive baseband configurations, carriers frequently strip out engineer menus accessed via secret diagnostic codes like *#*#4636#*#* or lock down cellular engineering modes.
Dialer Command Processing Pipeline:
- User enters dialer input sequence (e.g.,
*#0*#). - OS Telephony Framework intercepts input string.
- System checks for carrier firmware restrictions.
- If carrier customized: Execution blocked with “Invalid MMI Code” message.
- If stock unlocked firmware: HAL executes matrix menu directly.
When an un-customized OEM firmware receives a diagnostic dial sequence, it routes the payload straight to internal factory packages like com.sec.android.app.servicemodeapp (on Samsung) or com.miui.cit (on Xiaomi). On carrier-branded models, these background packages are often disabled, hidden, or deleted entirely from the system partition, neutralizing secret diagnostic codes.
If your carrier has locked out dial pad access to diagnostic routines, you can bypass the restriction by utilizing specialized third-party hardware diagnostic applications that communicate directly with Android OS APIs:
- In-Depth Diagnostic Apps: Download verified system utility applications such as DevCheck or AIDA64 from official application stores. These tools pull live telemetry data directly from Android hardware APIs without requiring active dial pad MMI access or secret diagnostic codes.
- PC-Based USB Diagnostic Suites: Connect your device to a computer via USB debugging mode and launch desktop hardware diagnostics using manufacturer utility tools or open-source ADB (Android Debug Bridge) command line shells to query hardware status registers directly as an alternative to secret diagnostic codes.
Frequently Asked Questions About Secret Hardware Diagnostic Codes
Can entering secret diagnostic codes void my phone warranty or erase personal data?
Entering standard secret diagnostic codes like *#0*# or *#*#4636#*#* will not void your manufacturer warranty or erase your personal photos, messages, and applications. These specific codes operate strictly in read-only or hardware-test modes designed to evaluate physical components. However, you should avoid selecting options marked Master Clear, Factory Reset, or NV RAM Clear within advanced engineering sub-menus, as those specific commands will wipe local storage partitions.
Why does nothing happen when I type #0# on my Android phone?
The *#0*# diagnostic code is a proprietary software sequence developed exclusively for Samsung Galaxy devices, making it one of the most popular secret diagnostic codes. It will not work on Google Pixel, Motorola, Xiaomi, OnePlus, or Sony smartphones. Additionally, if you own a Samsung device purchased directly through certain mobile network carriers, the carrier may have disabled access to secret diagnostic codes in their custom software update.
How do I exit a secret diagnostic menu if there is no back button?
Most hardware diagnostic matrices, such as Samsung’s *#0*# test screen accessed via secret diagnostic codes, intentionally hide standard Android navigation bars to prevent screen interference during full-display pixel tests. To exit these full-screen test windows, double-tap the top-left corner of the display, double-press your phone’s physical back key, or swipe inward from the left screen edge to trigger the universal Android back gesture. If a specific test freezes, press and hold the Power and Volume Down buttons for 7 seconds to force a safe system reboot.
Article Summary Table
| Hardware Component | Common Symptom | Diagnostic Code / Method | Expected Test Result |
|---|---|---|---|
| AMOLED Display | Dead pixels, image retention | Samsung: *#0*# (Red/Green/Blue) | Continuous solid color fill with no dark spots or ghosts |
| Capacitive Touch | Disconnected swipe lines | Samsung: *#0*# (Touch Grid) | Every square grid tile fills solid green when swiped |
| Cellular Radio | No 5G connection, weak signal | Pixel/Moto: *#*#4636#*#* | Live signal strength between -70 dBm and -100 dBm |
| Battery Health | Sudden power off at 15% | Samsung: *#0228# / System Bug Report | Vo charge percentage aligns with raw open-circuit voltage |
| Audio Microphones | Muffled voice on speakerphone | Xiaomi: *#*#6484#*#* (Mic Loopback) | Crisp, uncompressed audio playback across all mic ports |
| MEMS Gyroscope | Screen fails to auto-rotate | All Android: *#0*# or CIT (Sensor) | Live X, Y, Z coordinate values change on device tilt |
Additional Helpful Information
- Learn how to clear app cache and data – Clear App Cache and Data on iPhone and Android